Optimizing Your Network for Multimedia Streaming

Last updated: January 5, 2014

This article has had almost 20,000 views. Thanks for reading it.

How to Optimize Your Home Network for Multimedia Streaming

Wireless devices can be found many places in a typical home


Wireless networks can be found in almost every home and office. Setting up a Wi-Fi network for normal use is easy. But when you try to stream high-quality video, you’re likely to experience occasional stuttering or rebuffering. According to a study, almost one in five U.S. Internet users are unable to stream 720p HD video reliably. In some states, 40% of consumers cannot do this. When problems like this occur, you can do several things to improve the situation:

  1. Use an uncrowded channel – Make sure you’re not sharing the same Wi-Fi channel with others close to you. Many 2.4GHz wireless access-points default to the same channel when they are powered up. This can make congestion worse and lower your throughput. Download software like Farproc’s free Wifi Analyzer to get a visual picture of your network. It even tells you which are the best channels to use. Most routers will allow you to set the channel using your web browser.
  2. Utilities like this one tell you which wireless channels to use.

  3. Avoid overlapping channels – Use the channels 1, 6, or 11 when possible, because they are non-overlapping.
  4. Upgrade for more speed – If you have an 802.11b or 802.11g wireless router, consider upgrading to an 802.11n or 802.11ac router. Both are capable of faster data speeds and also support the less crowded 5GHz band. Some 802.11ac routers are capable of speeds over 1Gbps.
  5. The 2.4GHz band is much more crowded than the 5GHz band

  6. Use the 5GHz band if your devices support it – The 5GHz band is faster and not as susceptible to interference from cordless telephones, microwave ovens, baby monitors, Bluetooth devices and wireless keyboards as the 2.4GHz band. It’s also much less crowded and should be used as long as your devices support it, and you are not too far away from your wireless access point.
  7. A low-cost Wi-Fi Booster

    A low-cost Wi-Fi Booster

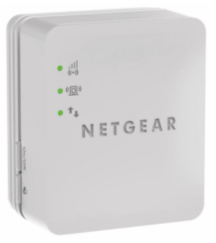
  8. Extend your range – If your problem is signal strength-related, consider using a Wi-Fi booster/repeater or wireless access point with better antennas like this one. By adding the $40 Wi-Fi booster shown on the right, I was able to increase my download speeds by almost 400%. An even better option for those who have a wired Ethernet network is to purchase a second router that supports 802.11ac. Make sure to set it up as an access point where you connect the first router to the port 1 and NOT the WAP port. Also make sure to disable the DHCP server. More details here.
  9. Consider wireless alternatives – When you’re having problems steaming HD video, you may want to consider wireless alternatives like HomePlug Powerline AV adapters. If you go this route, make sure your adapter is HomePlug AV-compatible so you can mix and match devices from other companies. According a recent article in Maximum PC, last-generation Homeplug AV 200 adapters were supposed to be capable of speeds of up to 200Mb/s. Even though they only got real world speeds were 60-70Mb/s, that’s enough for a single HD stream. Newer devices support the IEEE 1903 standard which is capable of theoretical speeds up to 500Mbps and real world speeds up to 100Mbps. These speeds are even faster than you can get over standard Ethernet wiring, so you should be able to stream multiple HD movies at once in your home using multiple adapters. Consider the TP-Link AV-500 TL-PA511KIT or eNetgear Nano 500 XAVB5101 adapters. Those are two of the best affordable adapters available today. Both should be capable of real world read speeds of over 62Mbps and real world write speeds over 54Mbps.

    Another good wireless alternative are MoCA adapters, which transmit multimedia data over coax cable. Both of these are capable of higher data rates and more reliable than most wireless routers.

  10. Test your download speed – If you stream media over the Internet, you should know what your download speed is. Even more important than the peak speed is the average speed. Watch whether the data rate is consistent, or fluctuates a lot. There are several good sites and apps which do this. More info.

An Ethernet Over Coax MoCA Network Adapter

Dual-Band Wi-Fi FAQ

Do all 802.11g/n products support dual-band?
No. 802.11ac was designed specifically for the 5GHz band, however, so it seems likely all ‘ac’ products will support 5GHz.

Who makes dual-band routers?
Most wireless routers sold over the past few years support dual-band. Examples include: Apple’s Airport Express, all ASUS routers (RT-AC66U, RT-N65U, RT-N66U and EA-N66) the Linksys N600, N750, N900 and AC1750 as well as routers from Netgear.

Here are just a few of the smartphones with 5GHz Wi-Fi support

Here are just a few of the smartphones with 5GHz Wi-Fi support

Do you have a list of mobile devices that support 5GHz Wi-Fi?
Here are a few of the devices which support dual-band Wi-Fi. Note: This list is not current. These days most mobile devices support 5GHz.

  • Amazon Kindle Fire HD
  • Amazon Kindle Fire HDX
  • Apple AirPort Extreme (2009 and later)
  • Apple computers with Wireless-N support
  • Apple iPad
  • Apple iPad 2
  • Apple iPad 3
  • Apple iPad 4
  • Apple iPhone 5 (and later)
  • Apple TV (2nd and 3rd gen.)
  • ASUS Nexus 7
  • BlackBerry PlayBook
  • Google Nexus 10
  • HTC Droid DNA
  • HTC Rezound
  • HTC Windows Phone 8x
  • LG Nexus 4
  • LG Nexus 5
  • Linksys EA-3500 wireless router
  • Linksys E-4200 wireless router
  • Linksys EA-4500 wireless router
  • Microsoft Surface RT
  • PCs with Wireless-N support (most, not all)
  • Samsung Galaxy Premier
  • Samsung Galaxy Nexus
  • Samsung Galaxy Note 10.1
  • Samsung Galaxy Note II
  • Samsung Galaxy Tab 3 8
  • Samsung Galaxy Note 3 (and later models)
  • Samsung Galaxy S II
  • Samsung Galaxy S II Skyrocket
  • Samsung Galaxy S III (and later models)
  • Samsung Galaxy S III mini
  • Samsung Galaxy S 4
  • Samsung Galaxy Tab 10.1 (possibly other sizes as well, but NOT the Galaxy Tab 2)
  • Samsung Nexus 10
  • Slingbox 500

Where can I go to find out if my devices supports Dual-band Wi-Fi?
Search for your device here. It’s dual-band if there is a “1” under 5.0 GHz transmit and receive.

Is 5GHz Wi-Fi faster than 2.4GHz Wi-Fi?
It you refer to the chart below, you’ll see some routers are capable of higher data rates when using the 5GHz band. More info.

Chart courtesy of Maximum PC

Is there a downside when using 5GHz Wi-Fi?
Yes. Not all devices support 5GHz Wi-Fi. Also, the higher frequency signals of 5GHz networks do not penetrate walls as well as 2.4GHz signals. This limits their reach inside some homes.

How can you force your devices to use 5GHz Wi-Fi?
‘Forget’ the 2.4GHz network and connect to the 5GHz one.

What’s better than 802.11n?
802.11ac is a new wireless-networking standard which is capable of speeds that are almost 3x faster than 802.11n. You can learn here about it here. In addition to higher throughput, 802.11ac has wider coverage and improved power efficiency. Although real-world speeds won’t always exceed 1Gbps, 802.11ac should be capable of speeds of 500Mbps at distances of 50 meters. Apple’s Macs now include support for 802.11ac. All premium routers now include 802.11ac support as well. Asus shipped a laptop with support for 802.11ac over a year ago.

Is anything else being done to improve streaming of multimedia around the house?
Yes, companies like Qualcomm are working on technology called StreamBoost. When combined with 802.11ac, this is supposed to improve performance by managing network traffic. StreamBoost-compatible products let users to see all the devices connected to their network and monitor the real-time bandwidth usage of every device.

What comes after 802.11ac?
According to this blog, “802.11ad improves upon the wireless capabilities introduced in 802.11n. Ideally, 802.11ad will allow devices to communicate over four, 2.16GHz-wide channels, delivering data rates of up to 7 Gigabits per second, even for mobile devices with limited power, a significant improvement over both 11n and 11ac.” More info about 802.11ad.

There are also people who say G.hn is the next big thing in home networking. It uses existing home wiring including coaxial cables, phone lines and power lines. You can learn here about it here.

More about what lies next in networking.

Another good article related to this topic.

If you follow the above guidelines, you should be able to stream high-definition videos without problems. Let me know if I missed any good Wi-Fi tips.

– Rick

Copyright 2013-2014 Rick Schwartz. All rights reserved. Linking to this article is encouraged. Network photo courtesy of Apple.


Follow me on Twitter @mostlytech1

Connected Home Best Practices

Last update: February 17, 2013

This article has had over 700,000 views! Thanks for reading it.

Back in 2009, there wasn’t much information around to help people set up a home network for multimedia, so I wrote an article called Connected Home Best Practices. This is an updated version of that article.

Connected Home Benefits

Before I get into any details, I thought I’d mention some of the benefits you might experience if you follow my guidelines below.

  • Watch all of your of your movies on any TV in the house without inserting a disc into a DVD player

    You can use a game console like this to access your media

  • Access your entire music collection of CDs and downloaded music from your receiver, computer, tablet or smartphone. You can even play different music in every room if you want
  • View any photo you’ve ever taken on any TV in your house or any mobile device
  • Drag and drop photos from Flickr, Facebook, Photobucket or Picasa Web onto a device to view them
  • Access your media 24/7 without turning on a computer
  • Copy media from your computers to mobile devices with needing a cable
  • Access all of your media from a game console
  • Have media automatically copied from your mobile device to your backup drive when you enter your home

These are just a few of the things which are possible with a multimedia network and connected devices.

Step 1 – Preparing Your Media

This first step is to collect all of your media assets. If you haven’t scanned your analog photos and digitized your home movies, you should consider doing that first. If you have DVD  movies, you might want to consider converting those to digital files as well. There is already a lot of info on the Internet about this, so I’m not covering it here. Here are some important things to consider as you prepare your media to be shared.

Some people digitize their DVD movie collections for easy access

    1. As you create your digital media library, try to use formats which are supported by the devices you plan to use. If you’re using AirPlay devices like Apple TV, you should use the following: AAC, MP3, Apple Lossless, AIFF and WAV audio; JPEG, GIF and TIFF images; H.264, MPEG-4 and Motion JPEG video (up to 720p). More info. If you’re using DLNA-certified devices you should try to stick with MP3 or LPCM audio; JPEG photos; and MPEG-2, MPEG4, WMV9 video. More info.
    2. Avoid buying copy-protected media when the same content exists in a legal, unprotected form. Unprotected media is superior because any device can play it and you’ll never have to worry about losing your licenses.
    3. When ripping audio CDs, choose high-bit rate MP3 or linear audio (WAV) over FLAC or Apple Lossless (ALAC), because not every device can play these formats. If you insist on lossless audio make sure all of your devices can play the format you plan to use.
    4. It’s essential that all of your music files have accurate ID3 tags. Your media server uses these tags to create its navigation trees. If any of your music files are missing artist, genre or album tags, those artists/genres/albums won’t appear in the navigation tree. You can still access that media from the song list, but it’s more time consuming. Tip: Software like Tag & Rename, can convert filenames into ID3 tags.
    5. Avoid editing metadata using iTunes or Windows Media Player unless you’re sure the changes you make are stored in your media as a standard tag format. Older versions of iTunes and Windows Media Player stored changes in the local database, so they would be lost when a file was moved. It’s better to use specialized software like Media Monkey, which enters metadata directly into an ID3 or EXIF tag, so it can be imported by software on any Mac or PC.

This drive backs up 2TB of media for only $159

  1. Create separate folders for each artist in your music library. Each artist folder should contain separate folders for each album. Each album folder should contain a JPEG file for the album cover. Normally this file is named “folder.jpg”. Your media server will use this file as album art. You can also embed album art in each music file as an ID3 tag, but doing this with file formats like WAV can cause problems with some media players.
  2. It’s a good idea to create separate folders for each year in your My Photos folder. Inside each year folder, you should have subfolders for different photo albums.
  3. You may want to also use software like Windows Live Photo Gallery to add tags or descriptions to your photos.
  4. And last but not least, make sure to perform regular backups of your media. After you do all this work, you won’t want to lose it.

Step 2 – Selecting a Media Server

    1. If you want to access your media without a computer on, you’ll want to get a network-attached storage device (NAS). Make sure your NAS has an embedded media server. Beware of older or inexpensive NAS devices. Some of these have memory limitations or slow CPUs have problems with large media collections.
    2. Do not encrypt the data on your NAS (at the partition or at a file level). The performance hit which occurs when you do this  is massive and the drop in transfer rates is likely to cause problems streaming video.

A NAS provides 24/7 access to your media

  1. Avoid using software like Microsoft’s Windows Media Player or Apple’s iTunes to share your media files. Premium media servers like TwonkyServer (and others) are faster and more reliable. They also support more devices and file formats.
  2. Make sure the virus scanner on your computer or NAS is not a CPU hog. Poorly designed virus scanners can cause skipping  problems during playback.
  3. Avoid running software firewalls like ZoneAlarm (unless you know how to configure them so they don’t cause problems). Make sure your software firewall isn’t blocking any of the ports it needs to function. Check the manufacturers’ site to obtain this info.
  4. Avoid storing media on a network share. It’s better to share content from a hard drive in the same device where the media server resides. Network shares increase the traffic on your network and can be unreliable.
  5. Don’t nest your media deeply under many levels of folders. Doing so, can slow down media scanning and increase the size of your media database.
  6. Be careful which folder you select as your watched folder. Do not select a folder your Operating System constantly updates, like a Temp folder, bit-torrent download folder, or the Windows System folder. A watched folder with lots of changes can slow down your media server.

Step 3 – Choosing a Connected Media Player

There is no single media player that’s good at everything. Each has its own strengths and weaknesses. Here are some suggestions which will help you to choose the right media player for your needs:

    1. Consider buying products which have been DLNA-certified because they normally undergo a higher level of testing than other connected devices. You can search for DLNA-certified products here.
    2. Not all DLNA-certified devices can be externally controlled. Make sure your media player can accept media which is pushed from your computer or mobile device. Many devices only can pull media using their remote controls. You can find a list of devices that meet this requirement here.
    3. If you’re having problems with a device, check to see if a newer firmware update addresses those problems. Keep in mind installing new firmware can create problems, so you should only do so if you know it will fix a problem you’re experiencing, or you can revert to a previous version if needed.

The Sony PS3 is a photo and music player, but you can’t beam media to it.

    1. Before using a game console as a media player, you should be aware of their limitations:
    2. You cannot beam media from your PC or mobile device to a Sony PS3 or Nintendo Wii. The Xbox 360 can accept pushed media, but only when it’s in Media Center Extender mode.
    3. Game consoles do not support as many formats as other digital media players.
    4. The Xbox 360 does not display all of the items in the Twonky navigation tree. As a result, you won’t see things like By Folder, Artist Index, Artist Album, Genre Index, Genre/Artist.
    5. Most game consoles, connected TVs and Blu-ray players can only play a limited number of media formats. Because of this, you’re often better off purchasing a low-cost connected media player, like a WD TV, which supports a wider range of formats.

What to look for in a connected photo and video player

      1. Make sure your digital media player can automatically scale photos so they appear full-screen. Not all connected media players and TVs can do this.

Apple TV handles pushed slideshows well

      1. The best digital media players, like the PS3, have nice transitions in-between photos and let you play music in the background while you are watching a slideshow. Xbox 360 has a nice zoom transition effect on photos. At this time, there are no media players other than Apple TV, which can display a continuous slideshow of photos pushed from a computer or mobile device. In most cases, a black or blue screen appears in-between each photo. If you experience this problem, use the remote which came with your device and select a folder of images to view. If you do this, you should see nice transitions between every photo.

      1. Don’t assume all media players can stream 1080p videos. Some can only play 720p, or have stuttering problems when they play 1080p.
      2. Don’t assume your connected TV will be able to play all popular media formats. Most DLNA-certified TVs can only play MPEG-2, AVCHD and a few other formats. Don’t expect 3GP, QuickTime, DivX, MKV or YouTube videos to play on these devices. If you want to play YouTube videos, you’ll need a Samsung TV, Sony TV (2011  or later), Xbox 360 or a WD TV Live.

What to look for in a connected music player

      1. Should be able to play all popular music formats (e.g. MP3, FLAC, AAC/M4A, ALAC, WMA and Ogg Vorbis).
      2. If you don’t have a connected receiver you should connect a media player your stereo receiver.
      3. Don’t assume that all media players can accept music playlists that are beamed from computers or mobile devices. Some only allow one song to be sent at a time.
      4. Don’t assume all connected devices can have their volume changed externally. Most stereo receivers disable this feature.
      5. Look for media players which can be grouped so you can have the same music playing in different rooms of your home. Examples: Linn multi-room music systems, Philips Streamium players, Sonos ZonePlayers, etc.
      6. If you have a great stereo system, make sure your media player has an optical output or good audio converters (e.g. Linn products, Sonos Zone Players).

What to look for in a media controller


Your computer or mobile device can act as a media controller. They can be used like a remote to play/stop or skip media. They can also stream media directly to certain devices.

      1. Should work with DLNA-certified devices and AirPlay-certified devices like Apple TV.
      2. A good controller should be available for Android and iOS mobile devices as well as Mac and PCs.
      3. A good mobile controller should be able to automatically hand off it’s playlists to an always-on device like a NAS. That way playback will not stop when the mobile device leaves the network or goes into power standby.

Network-related Advice

Not all home networks are ready to stream high-definition video. Here are some suggestions which will make your home network multimedia-ready.

Wired Network Tips

      1. Connect your media players using a wired connection when you have a choice. Wired networks capable of much higher throughput. Cat 6 Ethernet is up to 5 times faster than 802.11n wireless and less likely to have stuttering problems when streaming HD video. 802.11g Wi-Fi is fine for streaming music and photos, but can be problematic for HD video. The data-rate required for DVD-quality video is 9.8Mbps, while Blu-ray is around 40Mbps. Although it seems like a 54Mbps wireless router should be able to handle this amount of data, in reality, it probably can’t. Wired connections also don’t “drop” or have range problems like wireless connections do.
      2. Don’t back up your computer while you’re trying to stream HD video. This can cause videos to buffer.
      3. Don’t connect any of your PCs or devices to the “Internet” or “Uplink” ports on your router or switch.
      4. If you want to stream HD video over the Internet, check your Internet connection speed using sites like this. Most HD Internet movie streaming sites recommend a download speed of at least 3.0 Mbps.
      5. Use Cat 5e or Cat 6 network patch cords and cabling. They cost about the same as regular cable and could be a little faster.

Wireless Network Tips

      1. Dual-band Wi-Fi routers like the Linksys N600, N750, N900 over AC1750 are better for multimedia streaming because they support the 2.4GHz and 5GHz bands. The 5GHz band is much less prone to interference. Use the 5GHz band if your devices support it and range is not a problem.
      2. If you have problems with wireless devices on your network, consider power-line networking alternatives like HomePlug Powerline AV adapters. If you go this route, make sure your adapter is HomePlug AV-compatible so you can mix and match devices from other companies. According a recent article in Maximum PC, last-generation Homeplug AV 200 adapters were supposed to be capable of speeds of up to 200Mb/s. Even though they only got real world speeds were 60-70Mb/s, that’s enough for a single HD stream. Newer devices support the IEEE 1903 standard which is capable of theoretical speeds up to 500Mbps and real world speeds up to 100Mbps. These speeds are even faster than you can get over standard Ethernet wiring, so you should be able to stream multiple HD movies at once in your home using multiple adapters. Consider the TP-Link AV-500 TL-PA511KIT or eNetgear Nano 500 XAVB5101 adapters. Those are two of the best affordable adapters available today.
      3. Another good wireless alternative is Ethernet over coax MoCA adapters like these. Both of these are much more reliable than wireless routers. They are also capable of higher data rates. However, HomePlug is not without problems, it sometimes has issues with split-phase wiring and surge protectors. When using HomePlug, avoid using an AC power strip and plug the unit directly into the wall.
      4. If your wireless devices are having trouble seeing your media server running on your LAN, check your router to make sure that multicast is enabled.
      5. To increase performance, you should try to use wireless channels which do not overlap with your neighbors. If you have an Android device, you should download the “Wi-Fi analyzer” app by FARPROC. It shows which channel has the best signal strength.
      6. Try to place your wireless router in a location where it is as close to your media players as possible. Every time the signal has to pass through a wall it drops in strength. 5GHz wireless loses more signal than 2.4GHz when going through walls.
      7. Be aware that cordless phones, baby monitors, wireless security cameras and microwave ovens can all interfere with 2.4GHz wireless networks.

Router Suggestions

      1. Having devices connected to both wired and wireless networks at the same time can cause problems. If you can’t see your media server or some media players on your network, this could be the cause.

        Free apps like this make it easy to see wireless congestion

      2. Use DHCP because it makes setup easier. Don’t use fancy network setups with multiple subnets and hubs. Doing so can introduce latencies that cause problems with UPnP data.
      3. If you want to be able to stream multiple HD videos at once, make sure there are no 10Mbps routers or switches on your LAN. Use Gigabit Ethernet switches instead.
      4. Some routers and switches work better than others for media streaming. Problems with media playback stopping or stuttering often go away when a new router or switch is used.
      5. Changing router settings can also sometimes improve media streaming performance. Before changing any router setting, make sure to write down the old setting, in case you need to go back to it. If you have a busy network, collisions can occur that reduce your throughput. Lowering the fragmentation threshold can improve performance by reducing re-transmissions. Try setting the fragmentation threshold to 1,000 bytes and see if that improves media streaming. Be aware that using smaller packet adds extra overhead, so you shouldn’t set this value too low. Setting the threshold to the largest value (2,346 bytes) effectively disables fragmentation. Do not change this setting if you are not having media streaming problems. Another parameter that some users experiment with is the UPnP Advertisement Period. Some claim lowering this parameter can cause devices to appear faster on the network.
      6. If your router has a setting to enable or disable UPnP, it’s important you understand what this setting does.
        1. “UPnP AV” is a streaming protocol that allows UPnP software to discover and communicate with other UPnP devices. If this is disabled, you may not be able to discover media servers or media players/renderers on your network. This should be enabled for proper operation.
        2. “UPnP IGD” (Internet Gateway Device protocol) allows software to automatic configure port forwarding for remote access. This setting does not have to be enabled to browse or stream media. In some countries this setting is disabled by default because it can make it easier for hackers to punch a hole in your router’s firewall and gain access to your network. Keep this disabled, unless you need to allow remote access and do not know how to configure this manually. If the router lists UPnP without more details it probably refers to UPnP IGD. Check its manual to make sure.

The Final Word

If you’ve made it this far, you know what you need to optimize your home network for multimedia streaming. I hope you find some of this information to be useful. If you have any additional suggestions, please leave them in the Comments section.

Thanks.

– Rick

Thanks to Christian Gran, Jim Pfeifer, Angela Scheller, Cindy Vivoli, Ken Clapp and pcfe for also contributing to this article.

Copyright 2009-2016 Rick Schwartz. All rights reserved. Linking to this article is encouraged.

Follow me on Twitter @mostlytech1